

HTML is Hyper Text Markup Language. It is used in designing of structure of web pages and these web pages when are linked together, they form a website.
Hyper Text is something more than the normal text. It is basically, the text displayed on the computer screen or other presentational devices with references (hyperlinks) to other text. Hyperlink is the link upon clicking which we navigate to some different web page.
Markup means that HTML is tag based language. It refers to the sequence of characters or other symbols(tags). Tags are, in some way, like instructions that are embedded into text to perform formatting. They signal web browser to add some features in the normal text.
HTML is interpreted by browser, it can be embedded in text to add formatting and links to other web pages.
Every HTML document(web page) starts with <html> and closes with </html>. The basic structure looks something like-

After <html> tag, comes the <head> tag. Inside <head> tag, we can have <title> or <style> or <link> or <meta> tag.
<title> tag encloses the title of your HTML document. Let me show you the output of above code in my browser…
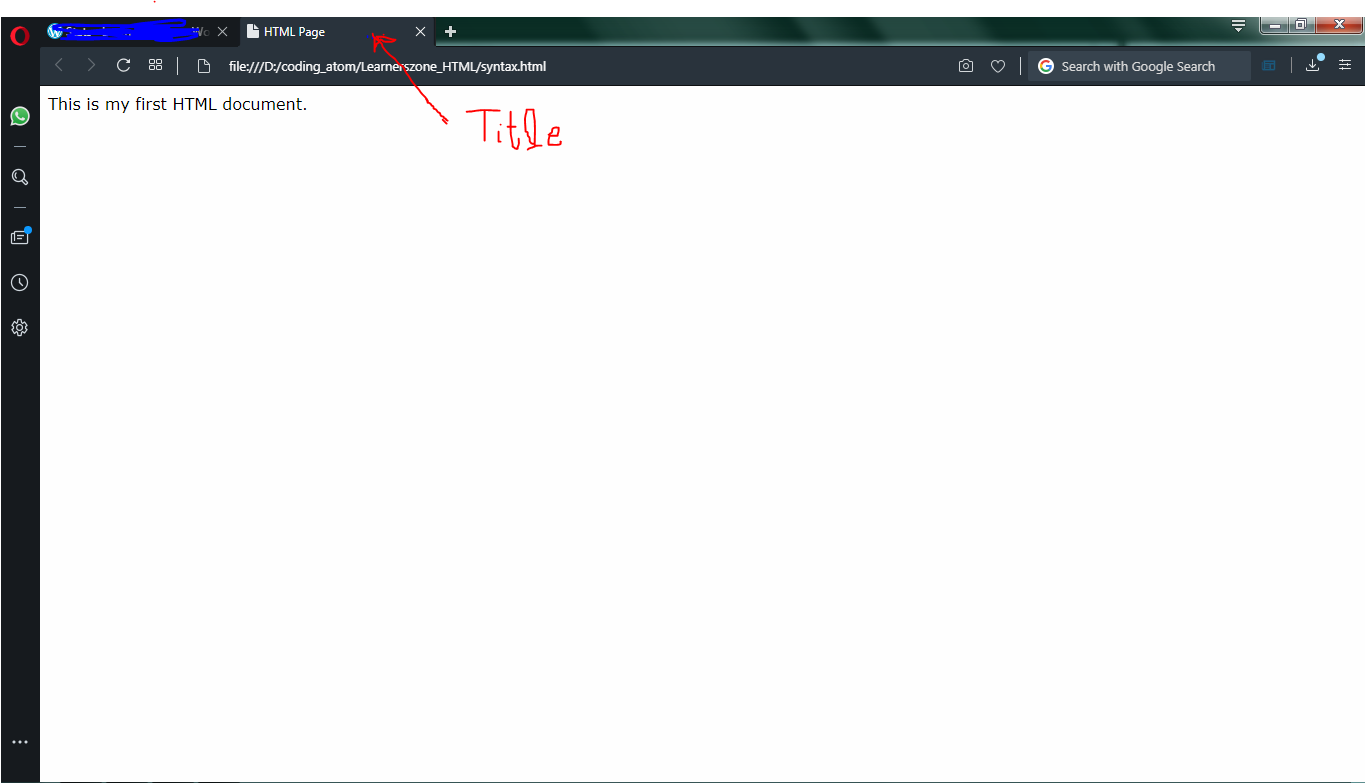
Now you must have understood <title> tag’s use. Whatever the text we want to be visible in the white screen above, is placed inside <body> tag.
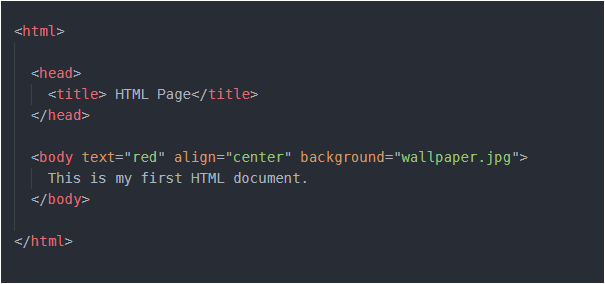
We can insert many properties inside body tag to make our content in the web page look good. Following are some commonly used tags-
bgcolor – used to set background color of web page ; text – used to change the color of text in the web page ; align – used to set the position of text ; background – used to set the image in the background of page.
Here, the point to note is- keep the image in same folder where you have saved your HTML file. And it will be more good if you create your separate folder and store all the HTML files as well as all photos in same folder.
Many face difficulty in setting background. They pay too much attention in the extension of image and as a result they download some image from web and save it as “some_name.jpg”. This should not be done. You save it just with “some_name”, do not insert “.jpg” by yourself. It is automatically done. And even some images are of “.png” extension and many more extensions are available. So after saving your image, to know of what extension your image is – just hover your mouse over the name of image in the folder where you have saved. That will let you know the extension of image. And now you can insert that extension in your HTML file along with name of image.
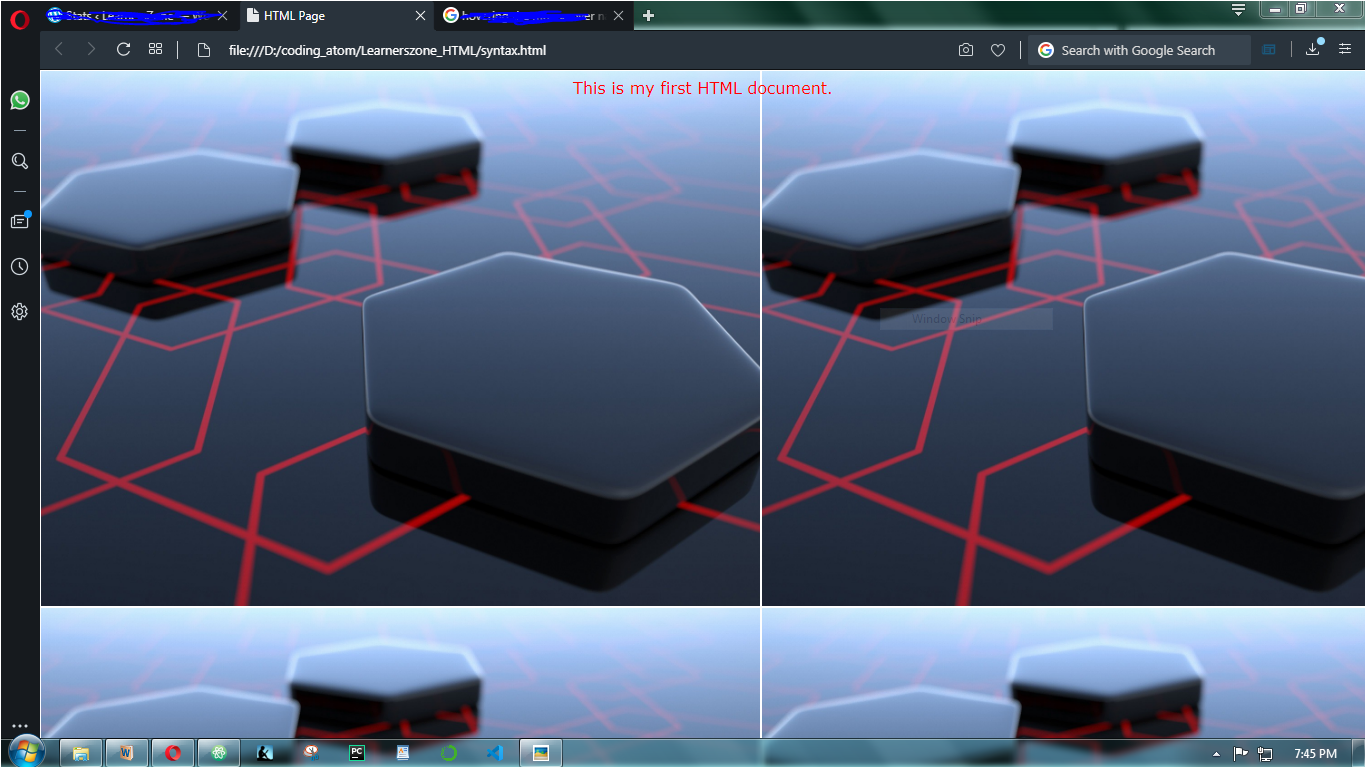
So the output of above code is-
If you are unable to get the extension, please share your problem in comments here, I will suggest another solution.
Have a ERROR-FREE code !

One thought on “HTML Basics”